Embroidery 101
“The flower is the poetry of reproduction. It is an example of the eternal seductiveness of life.” ~ Jean Giraudoux
Looking to embroider your company’s logo, icon or other image onto a Polo Shirt? Backpack? Cap? Embroidered items look sharp and have an upgraded appearance and feel over other decoration methods.
Two Steps Required to Embroider an Item:
- Image Digitizing – The initial set-up of the image to be embroidered
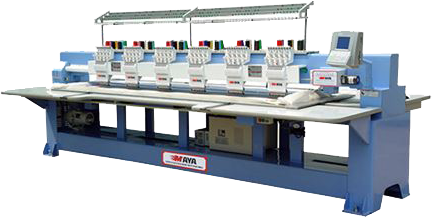
- Embroidery Run – Digitized image embroidered onto an item. Stitch count and Time.
Image Digitizing breaks down an image, logo or icon into the actual stitches that will be applied to whatever is to be embroidered. Digitizing software breaks down the image into specific types of stitches and creates a file that can be loaded into an embroidery machine for production.
Three Primary Embroidery Stitches:
- Straight Stitch – A straight stitch is the foundation of all embroidery. These stitches will repeat a line of stitches, and they may vary in length and width. When using a straight stitch, you’ll have a repeat of single lines to make a single pattern. Thicker lines are made by repeating a stitch over many passes. Straight Stitches are also used to create curves and shapes, so everything isn’t just straight. You can make anything with the straight line from logos to ornate pictures and more.
Straight Stitch is used most often for:
- Detail work
- Shading
- Single Color Drawings
- Outlining
- Satin / Column Stitch – Satin stitches are most commonly used with text. While these stitches can be used outside of text, they provide a shiny look that is perfect for most images. The anatomy of a satin (or column) stitch is essentially a stitch that tracks back and forth over a small area.
Satin Stitch is to use this stitch on areas that are less than a centimeter across and other project areas, including:
- Inside text
- Borders
- Anything that is Narrow
- Fill Stitch – This stitch’s purpose is indicated by its name: it is used to fill patterns. Alternated lines are used with these stitches that makes them look woven. The density of the fill can be modified to provide a different effect, but generally, these stitches are used when you need to completely cover the base material.
Fill Stitch can be all one color or a blend of colors, for added effects. Fill Stitch is most dense than Straight or Satin Stitch and can greatly increase the overall stitch count.
Embroidery Run:
Once an image has been digitized, whether a simple single color or a one with multiple colors, it is the quantity of stitches mostly determines the “running” cost per item to be embroidered. Secondarily, numerous color breaks can also add to the running cost. A 5000-stitch embroidery run takes about 10–12 Minutes to complete.
Most images (logos) embroidered on the upper left chest of a polo shirt or the front panels of a baseball cap, unless there is an abundance of Fill Stitch, are under 5000 stitched.
Final Note:
Embroidery does not work well for every image. Simple images are better. Very complex images, with multiple colors, and fine details, may not be suitable for embroidery. Alternative decorating using dye sublimation or silk screening, rather than embroidery, may be the better solution.
Researched and Complied by: SMarketing Founder, Michael T Grewe. SMarketing is a San Diego, California based company that offers graphic design service, printing and promotional products.


Leave a Reply
Want to join the discussion?Feel free to contribute!